Table of Contents
Introduction
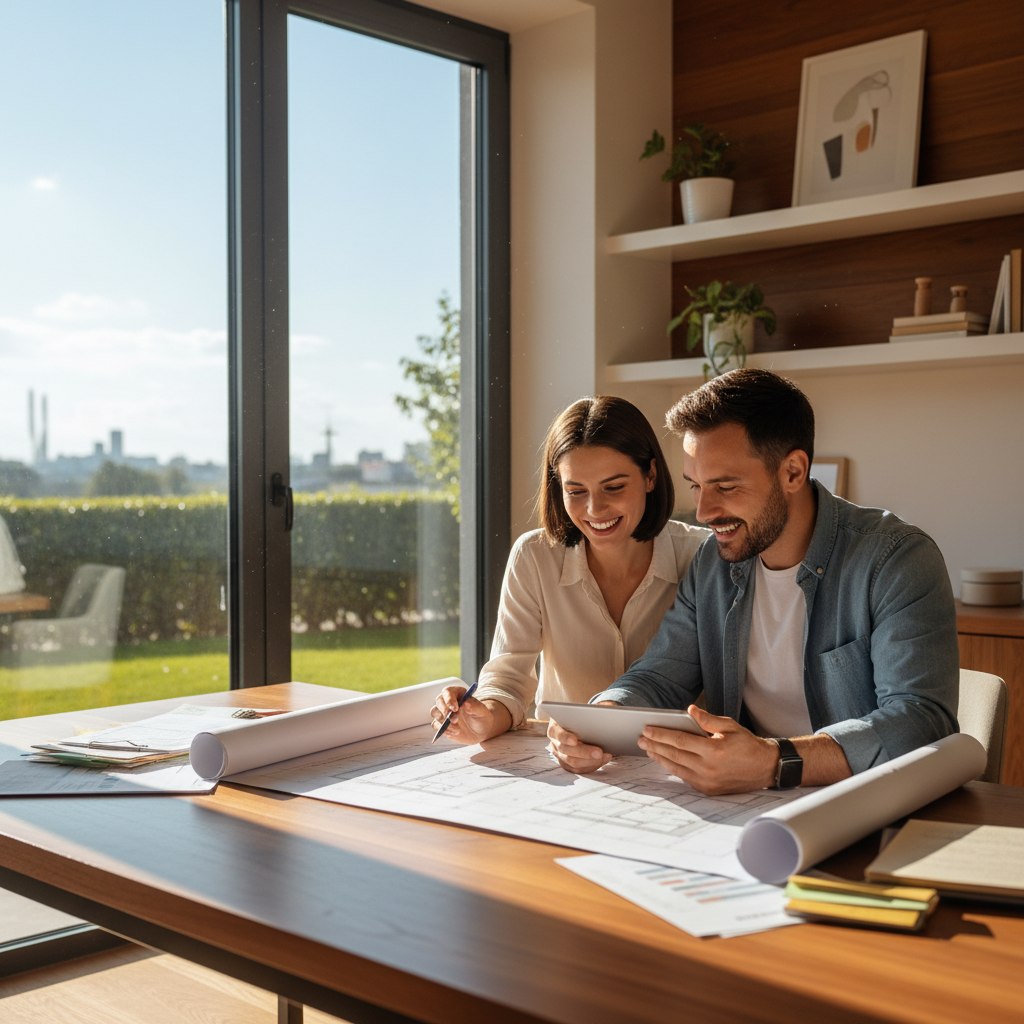
When you walk onto a property for the first time—maybe it’s a bright‑morning showing or a dusk‑lit open house—and you get that instant feeling, whether it’s excitement or a vague unease, that gut reaction can end up being the single most powerful factor that decides if the house flies off the market or sits there gathering dust, therefore the way a home presents itself at the very moment it meets potential buyers is nothing short of a make‑or‑break moment, because in real‑estate the competition is fierce, every listing feels like a contestant on a never‑ending talent show, and just like a performer who steps onto the stage, a house must catch the eye, spark curiosity, and whisper promises of comfort and lifestyle, otherwise the buyer’s mind starts to wander to the next door, to the next curb, to the next advertisement, and even though agents may try to smooth over flaws with glossy brochures and polished language, the raw, unfiltered impression that walks in through the front door—like sunlight spilling onto a living room floor, the sound of a creaking floorboard, the smell of fresh paint or stale mustiness—talks louder than any sales pitch, consequently sellers who invest time in staging, cleaning, and fixing the little things end up giving that property an extra boost, while those who neglect those details watch opportunities slip away, and you might wonder, can a simple fresh coat of paint truly change the fate of a house, or is it the invisible atmosphere created by a tidy yard and a welcoming entryway that does the heavy lifting, the answer often lies somewhere in between, because buyers, after all, are human beings looking for a place that feels like home, not just an investment, and in a market where listings appear and disappear at a breakneck speed, the first impression acts like a silent handshake, a quiet hello that either invites conversation or leaves you standing awkwardly on the porch, therefore, paying attention to curb appeal, lighting, scent, and the subtle cues that tell a story about the home’s character can be the difference between a quick sale and an endless waiting game, and while some might argue that price is the ultimate driver, the reality on the ground shows that a property that feels right, that resonates with the buyer’s imagination, often commands a price that matches or even exceeds its initial valuation, so, in the end, the initial sparkle, the immediate visual and emotional impact, becomes the gatekeeper to the entire selling process, shaping expectations, guiding negotiations, and ultimately determining whether the property finds its new owner swiftly or remains a lingering “for sale” sign on the street for months to come, all because that very first look can set the tone, spark hope, and plant the seed of possibility in the mind of anyone who steps inside, and that, simply put, is why first impressions matter more than you might think.
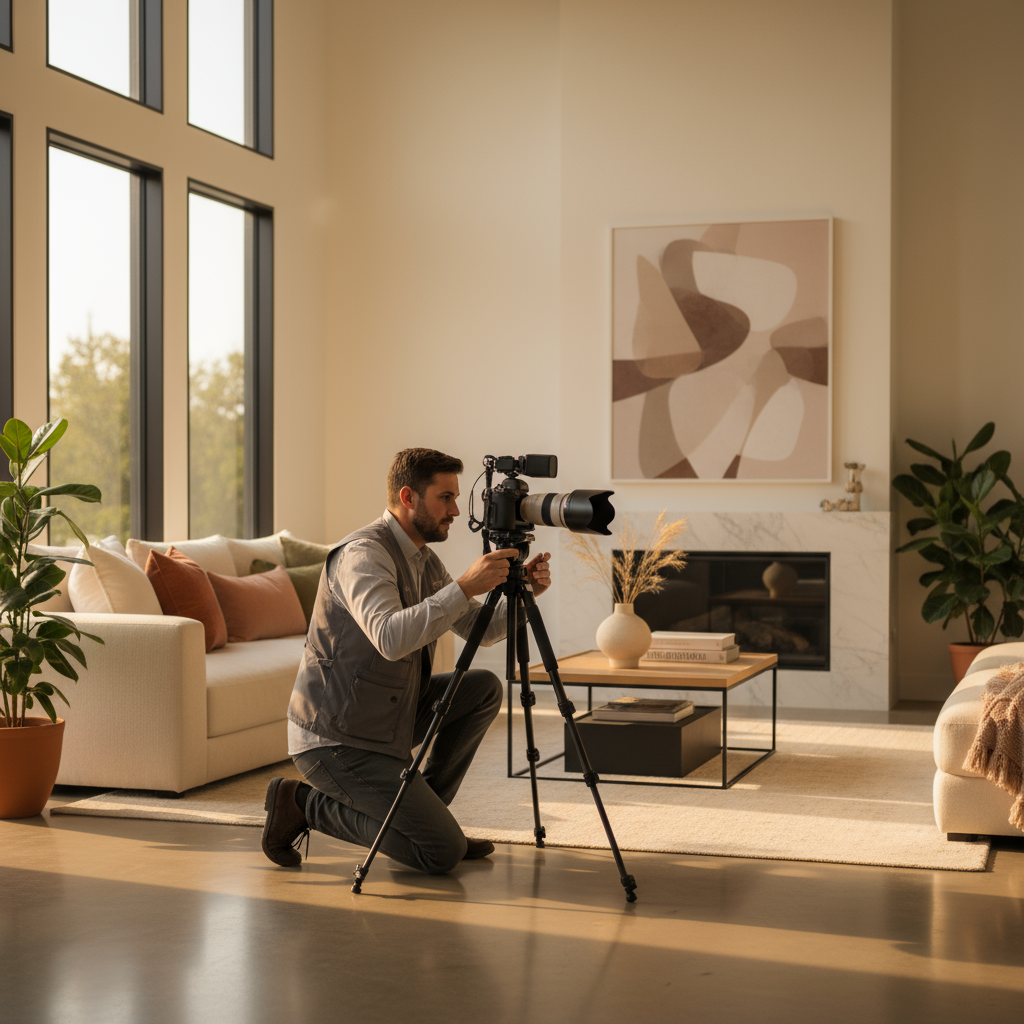
Imagine a buyer looking at listings; a bright photo stops them, a dull one sends them scrolling, therefore good shots can speed a sale, while poor pics don’t help and the home just sits. > Photos that grab a house’s own charm and details; that’s the key, therefore listings actually sell nowadays. **Honestly, a good photo. The house’s feel, so buyers picture themselves inside, that’s why it matters.** **More than nine out of ten people hunting for a home start on the internet; therefore they scroll through pictures on sites like Zillow and pick the few houses they actually walk up to. Who wouldn’t choose a house just from a photo?** Since the photos look sharp, buyers feel something and can picture themselves living there; it works. Bad or dark photos waste buyers time and they quit fast, even if the house looks great in real life. Right photos pull out big rooms, sunshine flooding the floor, garden tidy and bright; who wouldn’t think the house’s worth more? Many sellers and agents try snapping pics with their phones or cheap cameras, do they think that’s enough? therefore they overlook the skill and gear needed for truly eye‑catching real‑estate photos. Bad light, weird angles, clutter everywhere, off‑balance shots: they ruin a listing’s vibe, so it doesn’t catch eyes; therefore nobody looks twice. DIY photography doesn’t always bring a quick sale, but finding that sweet spot between clear technique and a keen eye? That only shows up after practice and preparation, therefore. Spot the common errors, try fixing them; therefore property photos end up looking a lot better. Also, stage the house and time the shoot for the best light; that’s the real trick. Imagine a room clear bright free of junk; therefore it grabs shoppers’ eyes first, then their emotions. When the shot is done, editing takes over; therefore adjusting light, tweaking colors, and pulling out unwanted stuff can makes photo look its best. Think about hiring a pro photographer when the moment feels right; it could make your listing shine, especially fancy or tricky homes that need every tiny detail captured.
What You’ll Learn in This Guide
You’ll start with basics of shooting a house, then pick up lighting tricks; finally you’ll see how to make pictures sell. Therefore you’ll be ready for real‑estate photography. Who wants bland photos?
If you own a house and need better listings or you’re an agent trying to show homes right, therefore these easy tips give you clear photos that pull buyers. **Essential Equipment:** learn the must‑have cameras, lenses and accessories – they form the base for pro‑quality photos. We’ll go over why most pros reach for a DSLR or mirrorless camera and a wide‑angle lens ‘cause that combo just tends to be the pick in the industry.
In a house listing the photos are basically the first handshake with buyers, therefore a clear, bright shot can totally sway whether anyone looks further.
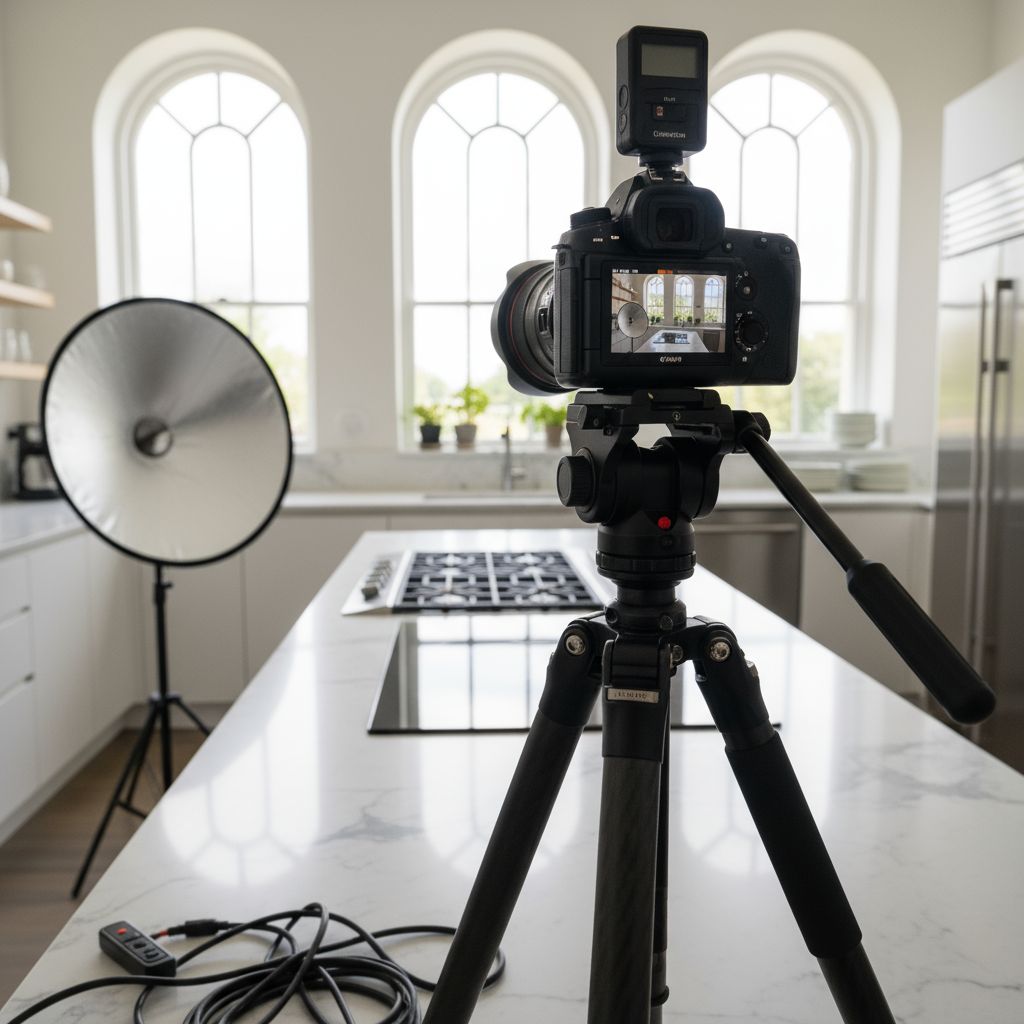
When you start digging into how to get eye‑catching property photos, it quickly shows the whole trick lies in knowing which gear to pick and which simple techniques flip a plain shot into a real visual story. You’re a newbie. You’re a pro. Either way, learning these basics lifts your shots; therefore your property listings pop. Having the right gear is what makes real‑estate photos look professional; miss it, and they end up looking cheap. Your camera and lens quality decides image clarity, depth, and how much of a room you can fit into a photo; therefore, vital for showing a property’s best features. Manual knobs? Yeah, they love those and the photos come out clearer, so that’s why a DSLR or mirrorless gets most love. Lenses, just as key; a wide‑angle lens captures whole rooms, makes the space feel more inviting and larger. Pick the right tools, therefore the whole shoot ends up with the tone you wanted. Besides the camera and lenses, many accessories (they really boost your photo results). *A solid tripod? Must‑have. It keeps the camera still, so hand shake won’t blur the shot, especially with those slow indoor shutters.* External flashes and reflectors, they let you brighten dim corners and stop harsh shadows from ruining the house’s appeal. Buy the tools, then your finished pictures get way more polish—so they look far more professional. Knowing which gear matters lets you pick smarter, therefore your shoot run smoother. So, pick a DSLR or a mirrorless—you can mess with aperture, shutter speed and ISO, therefore you get real flexibility. **Adaptability matters, you get vivid pics even when the light shifts.** Fit an entire room in one shot with a wide‑angle lens; that shows the true size and layout of the place. Moreover, it’s handy when you want buyers to picture the space. Therefore, use them careful, else the view gets twisted and you end up with a false impression.
Furniture and arches placed just right, therefore the room feels like your eyes just drift. Nothing here, no point to make.
In conclusion, getting those eye‑catching shots of a house or an apartment isn’t just about pointing a camera and clicking; it’s about pulling together the right gear, the right habits, and the right prep work, and while many think a fancy DSLR alone can do the trick, the truth is that without a sturdy tripod (or even a cheap but steady phone mount) the images end up shaky, and if the lens you pick isn’t wide enough you’ll miss the whole living‑room layout, so you start by picking equipment that balances price and performance, maybe a mirrorless body that’s light enough to move around rooms quickly, a lens that can capture both tight corners and wide open spaces, a flash that can be bounced off ceilings, and a remote shutter that stops you from shaking the camera at the moment you press the button, then you move on to techniques that feel almost like habits after a while, like scouting the best time of day for natural light, waiting for the sun to pour in just enough to make the walls glow without blasting harsh shadows, turning on all interior lights and opening blinds to let the outdoor light flood in, adjusting the white balance so the whites don’t look bluish or yellowish, setting the aperture to around f/8 so everything from the foreground to the background stays in focus, and using a low ISO to keep the image clean, all while remembering that real estate photography is more about showing space than showing artistic flair, therefore you keep the composition simple, line up the camera so the walls are straight, watch out for vertical lines that tilt, include a piece of furniture to give a sense of scale, maybe a lamp or a chair that viewers can picture themselves using, and never forget to declutter the scene—remove stray shoes, hide dishes, turn off TVs and hide cords, because every little distraction pulls the eye away from the property’s best features, moreover you should stage the home to look lived in but not lived in, perhaps a vase of fresh flowers on the kitchen counter, a neatly folded blanket on a sofa, a book or two on a coffee table, which adds warmth without feeling staged, and after you’ve done all that you need to double‑check the settings, take a test shot, look at the histogram to see if any highlights are blown out or shadows are crushed, adjust the exposure compensation if needed, and shoot multiple angles—one from the doorway to capture the whole room, another from a corner to show depth, a third from a higher point to reveal the layout, because a single viewpoint rarely tells the whole story, and when you get back to the computer you shouldn’t just dump the files and call it done; you need to edit them with a light touch, perhaps boost the brightness just a bit, increase contrast so the textures pop, correct any color casts, straighten any tilted lines, crop out any unnecessary edges, and save the final version in a format that keeps quality while keeping file size reasonable for online listings, all this sounds like a lot and it can feel overwhelming at first, especially for a student juggling classes and maybe a part‑time job, but think of it as a checklist you can tick off each time you walk into a new property, and with practice the whole process becomes faster, smoother, and the pictures start to look professional enough that potential buyers linger longer on the listing, which in turn can lead to quicker sales and higher offers, and that is why mastering the mix of solid equipment, thoughtful shooting habits, and thorough home preparation isn’t optional, it’s the core of creating stunning real estate images that not only showcase a space but also tell a story that makes viewers imagine themselves living there, therefore if you follow these steps—choose the right gear, plan the lighting, stage thoughtfully, shoot methodically, and edit subtly—you’ll find that capturing breathtaking property photos becomes less of a chore and more of a skill you can rely on, and even if you make a mistake here or there, a mis‑exposed shot or an oddly framed corner, you can learn from it, adjust the approach, and improve next time, after all, photography is as much about learning from errors as it is about capturing perfect moments, so keep experimenting, keep reviewing, and keep refining your process, because at the end of the day the goal isn’t just to fill a folder with pictures, it’s to create images that help a house feel like a home and persuade someone to take the next step, and that, simply put, is what makes great real estate photography work. Grab a DSLR or mirrorless camera, put a wide‑angle lens on it, you’ll end up with clear pictures that really show the whole room and each tiny architectural detail. Tripods and lighting gear like external flashes and reflectors, they boost clarity and brightness therefore each room feels inviting without shadows or glare. It’s also key to follow basic photo rules; keep the camera level or you get warp, therefore try a new angle, and use the gentlest natural light so your photos feel warm and deep. Learning basics turns plain photo into story that sticks with buyers, therefore catches eye. Even with good gear and careful angles, the pictures only shine when the house is staged right, therefore the shoot succeeds. You clear the junk, you tidy the rooms—therefore it’s open, welcoming, and set for the next owner. Shouldn’t you set the shoot for early morning or late afternoon, because that natural light makes the pictures feel richer. After you snap a photo, you then begin editing it careful. Adjust exposure, balance white, straighten lines; therefore add HDR or erase unwanted objects – the result’s a clean photo that shows the house’s best spots and hides its flaws. **Therefore, each step leans on the one before it, ending up with a portfolio that really shows the way life feels in a house as well as its walls and roof.** Want better shots? Grab a camera that fits your style, play with light and angles until the room feels right, and set up the furniture and décor before you click; therefore your real estate photos will look a lot better. You can try a simple editing app, give the photo a tiny lift of brightness or just a hint of sharpness, then stop because too much makes it feel fake, so it stays authentic. For a high‑end home where every detail matters (do you think you can skip a pro photographer?), hiring one is wise—therefore their know‑how and gear can pull in picky buyers and push the price up. Whether you DIY or hire a pro, learn the basics and you’ll show a home at its best; therefore the photos do more than snap a room, they help buyers picture their future life there. Therefore, bring solid gear, learn tricks, set rooms on purpose, edit photos: you’ll see your property marketing finally hit its full power. Can patience and practice help your photos catch that tiny spark that makes a listing sell, therefore keep trying and they will. **Remember: every great listing? it starts with a good photo.** You’ve got the tips, feel confident; therefore your real‑estate posts start getting the attention they truly deserve. Could you please provide the sentence you’d like me to rewrite?